Summary
Live Transcription provides artificial intelligence (AI) transcription services, enabling speech to text transcription in Zoom Meetings and Zoom Webinars. This feature is enabled by the host of the meeting or webinar once it begins. Participants will not see the Live Transcript option unless the host enables it.
Tips
When Live Transcription is enabled, remember to…
- Use an External Microphone: An external microphone/headset provides better audio quality and, therefore, more accurately matches what is being said verbally.
- Speak Slowly: Speaking slowly enables a more accurate match to what is being said verbally and allows others to follow the automatic transcript or subtitles.
- Take Turns/Pause Before Speaking: Zoom’s active speaker tracking is used to identify the speaker. When another individual begins speaking, it can take a second or two before Zoom updates the transcript to identify the new speaker.
Note: This feature is not available in breakout rooms.
Artificial Intelligence (AI) captions are only about 85% accurate depending on various factors such as sound quality, speaker accent, etc. Please reach out to CIRT or SAS to discuss options for accommodations on a case-by-case basis.
Getting Started
To turn on this account feature, enable Closed Captioning under your Zoom account settings, In Meeting (Advanced), and then check the live transcription box.


Enable Live Transcription in a Meeting
As the meeting host:
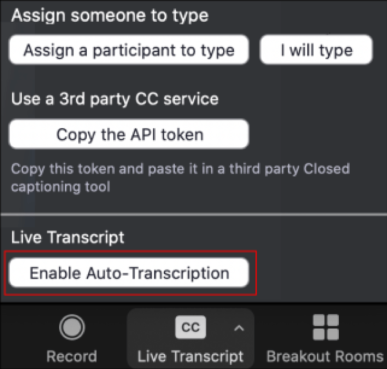
- Click Live Transcript at the bottom of the Zoom Toolbar.
- When the Live Transcription menu opens, click Enable Auto-Transcription.

Note: If the meeting is being recorded and you have enabled Live Transcript, you will receive a copy of the transcript in the same location as your recorded meeting.
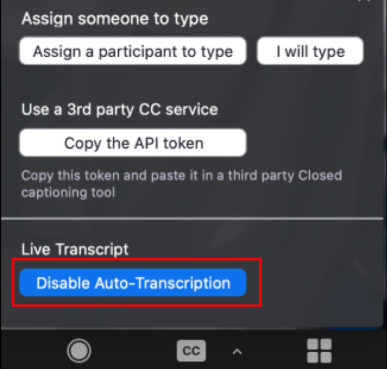
- To turn off Live Transcription, click Disable Auto-Transcription in the Live Transcript menu.

- Hosts can also disable Save Transcript. Click to toggle off Save Captions in the Settings tab of the Zoom web application.

View Live Transcription in a Meeting
Once Live Transcription is enabled, participants have the option to choose how they want to view the robot transcription feature.
- Click Live Transcript to choose a transcript option.

- Show Subtitles displays subtitles on the screen.
- View Full Transcript displays subtitles in real time with both the speaker’s name and a time-stamp within the transcript window. We recommend this setting as best practice.
- Subtitle Settings will open a window where you can adjust the font size of both the subtitles and the chat window.
- Click View Full Transcript to view subtitle and speaker.
- If you would like a copy of the transcript, click View Full Transcript and Save Transcript. A copy of the transcript will be downloaded to your machine.
Note: The transcript saves up to the moment of clicking Save Transcript. We recommend you click Save Transcript just before the meeting ends to ensure you have the transcript from the entire meeting. Also note that this option may not be available if the host has disabled this feature.


